5分钟阅读
如何让FLUX1 Kontext指哪打哪?我尝试了这个方法。
前言
相信大家已经陆陆续续了解到了FLUX.1 Kontext 的强大,我体验下来,也确实很赞,感兴趣可以回顾一下:
更由于其价格相对低廉(虽然也贵~),大可以替换 gpt-4o-image 模型,作为日常的改图模型使用。
但是,这个模型有时候未必做到指哪打哪,其根 gpt 最大的差别,也许还有一些,问题出在哪里呢? 今天我尝试尝试了一些方法,让他更加好好用,只是抛砖引玉,供大家探讨。
先看效果
风格重绘
输入提示语:
保持左图的结构,使用右图的风格进行重绘。
需要观察拼接后的图像位置。
输入图(stitch拼接后):
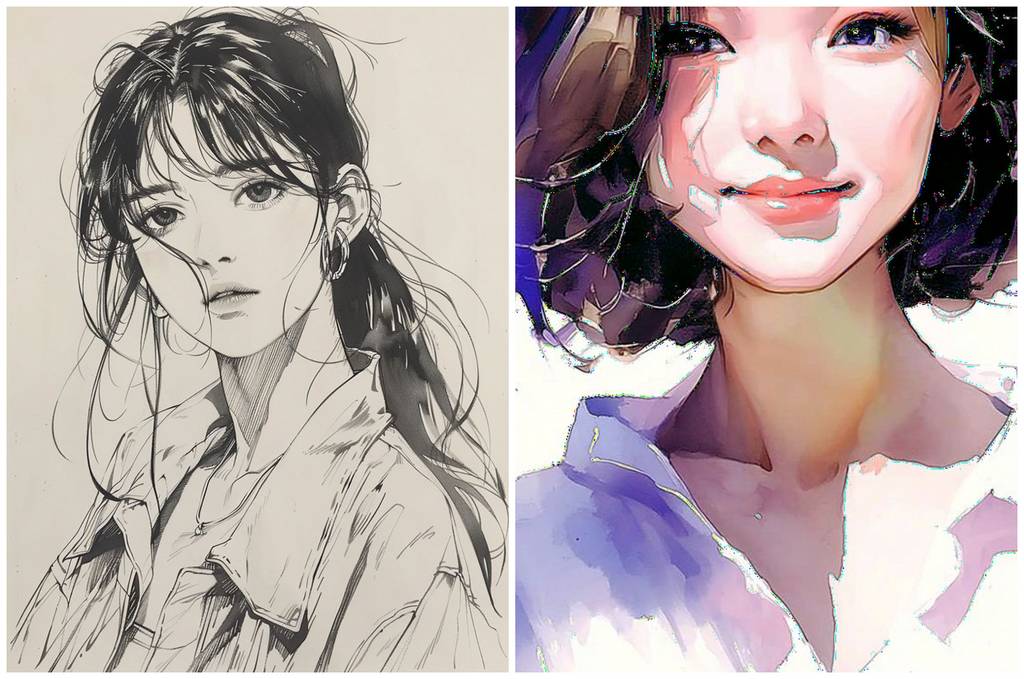
输出图:

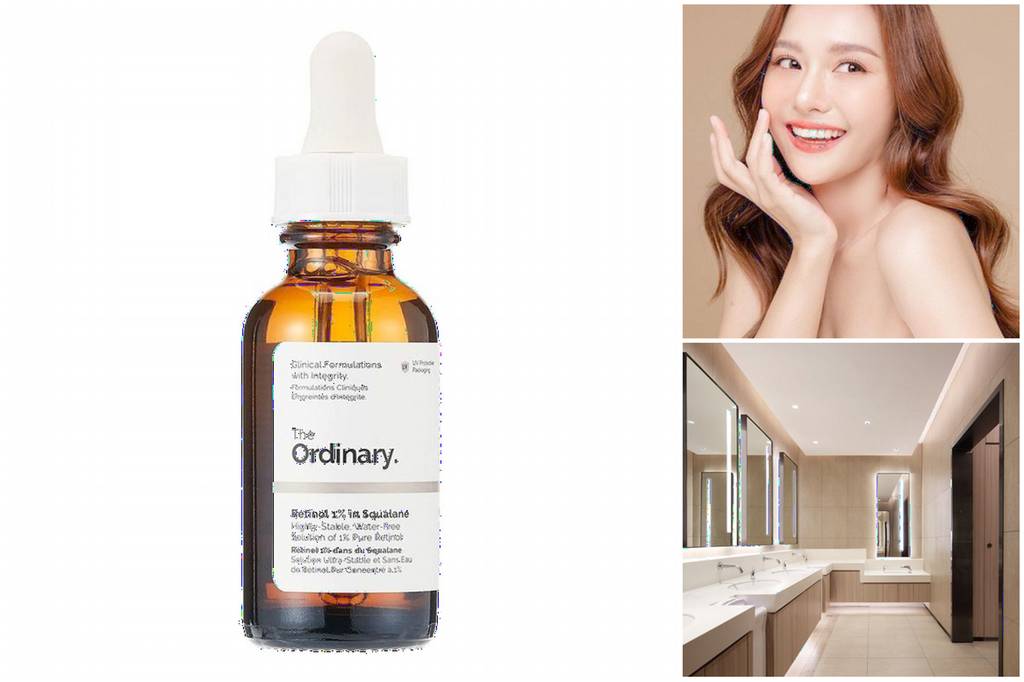
产品迁移
将精华露瓶子,放在右边的场景中,要求产品和场景结构不变。
输入图:

输出图:

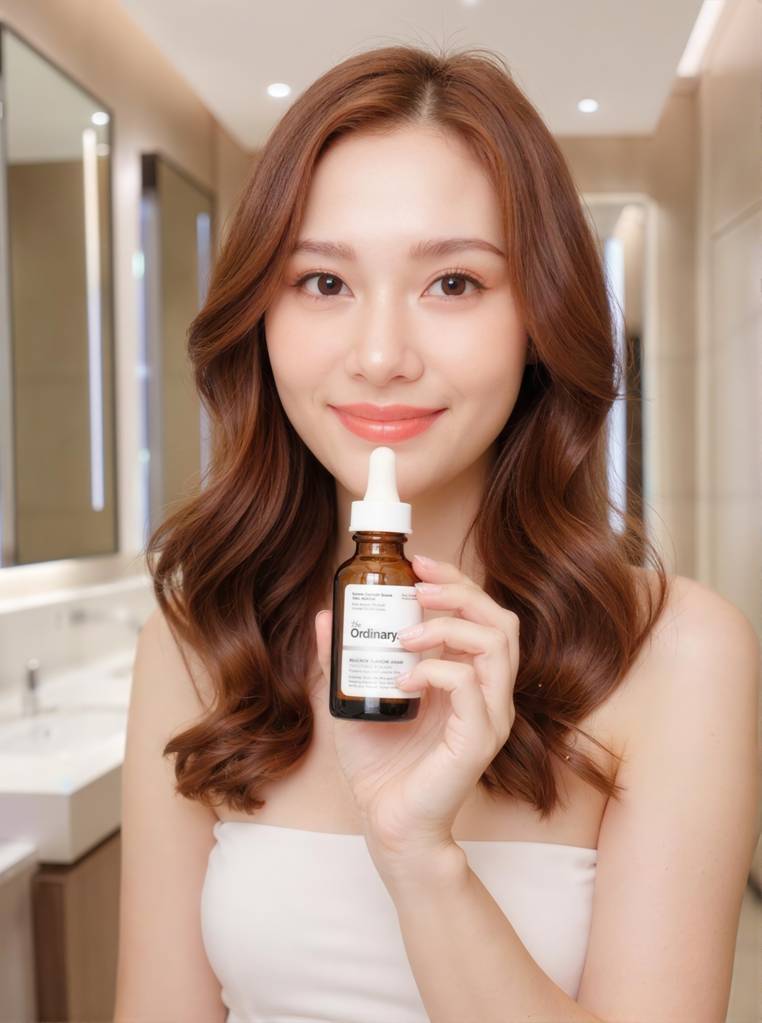
产品上身
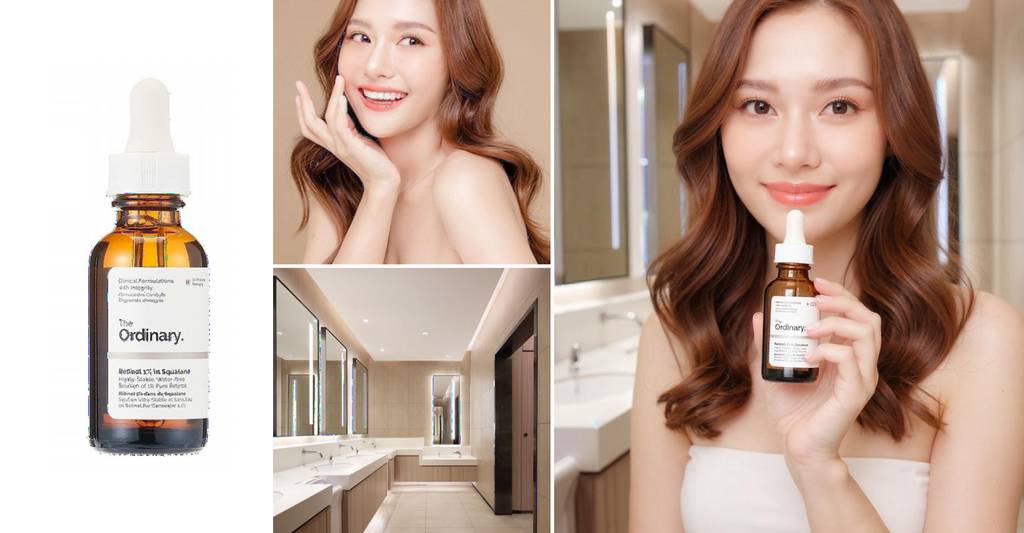
模特拿着精华露瓶子,在浴室中。将图中的所有元素融合成一张图。
输入图:
输出图:
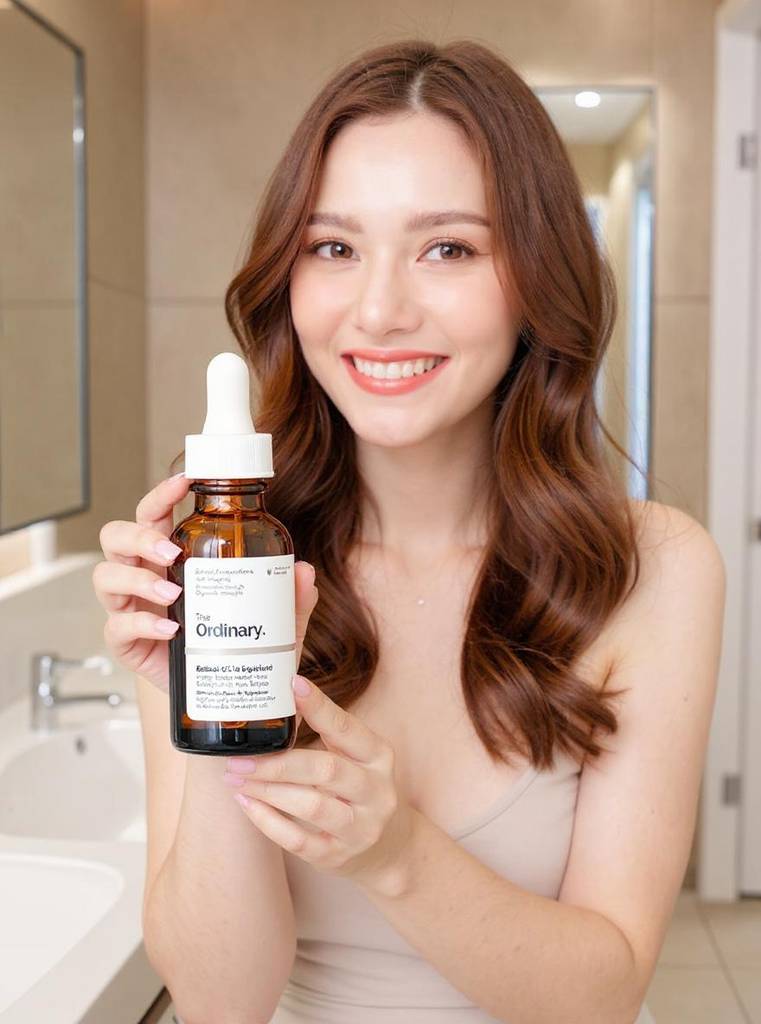
产品尺寸偏大,可以通过缩小产品比例达到缩小效果。但是都是非精确尺寸。
缩小尺寸后:

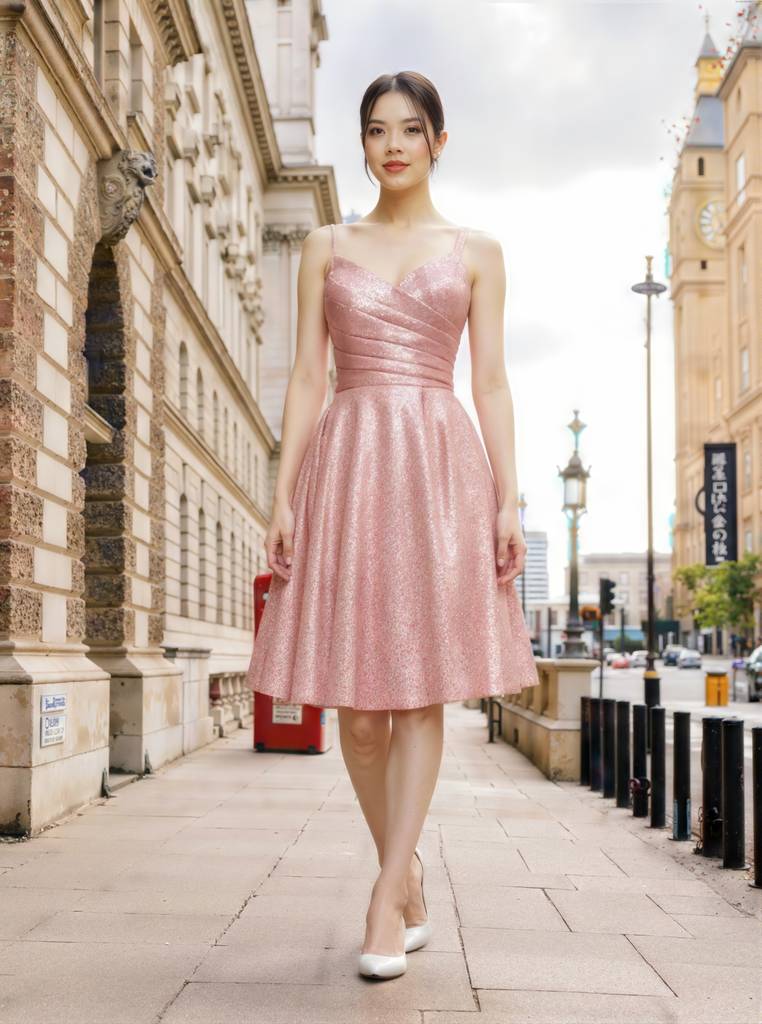
衣服上身
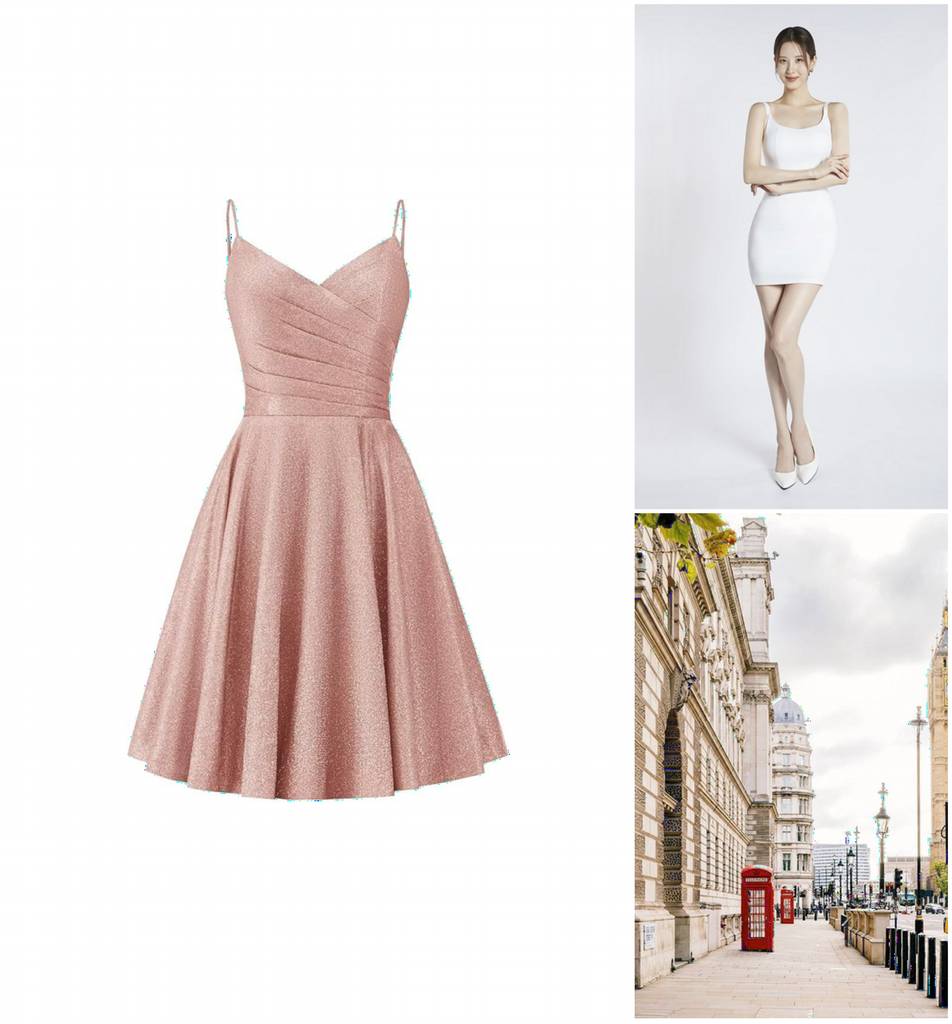
模特穿着左图所示的衣服,右图的街道上展示。将图中的所有元素融合成一张图。
输入图:
输出图:
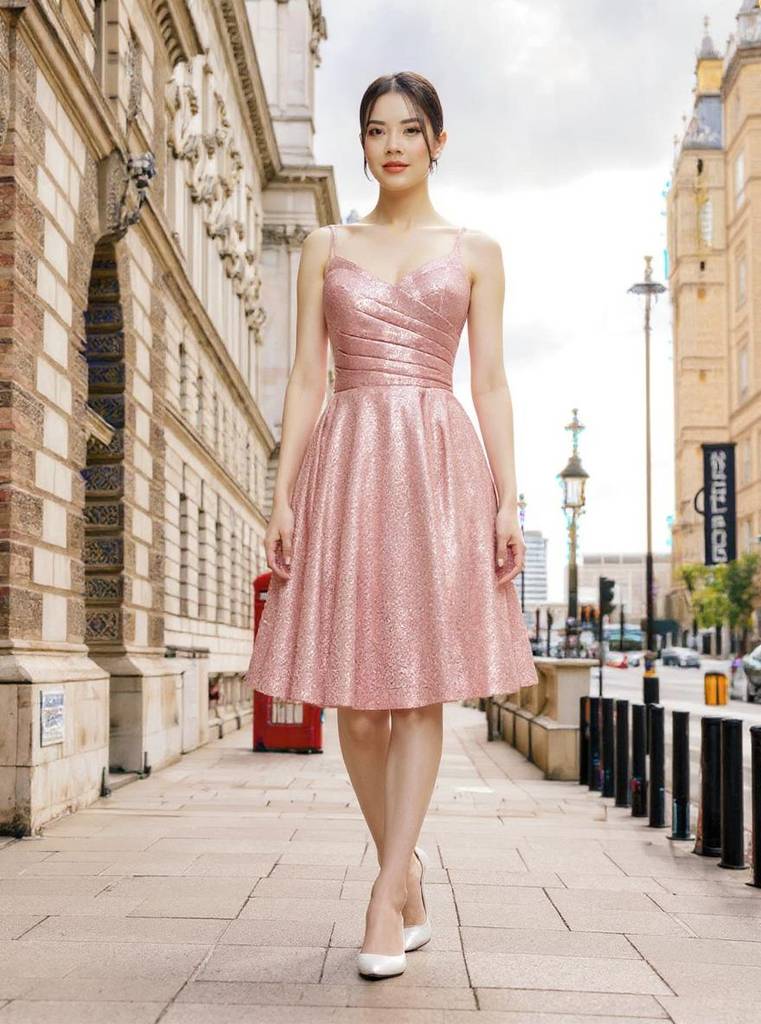
可以说非常不错哇~,衣物和街道都保持的很好,甚至拍摄角度都是依据街道来的。
更多的就不测试了(散发出铜臭的味道~😭),反正原理一样。
探索方案
其实方案也很简单,目的是增强图片的理解和提示语能力。通过接入 llm 语言大模型,作为前置条件,给 FLUX. 1 Kontext 做提示语的前置处理,基本流程如下:
- 使用 stitch 拼合图片;
- Llm 视觉模型,识别拼接图像,注意位置关系;
- 整合提示词和图像内容;
- Llm 再进行提示语处理。
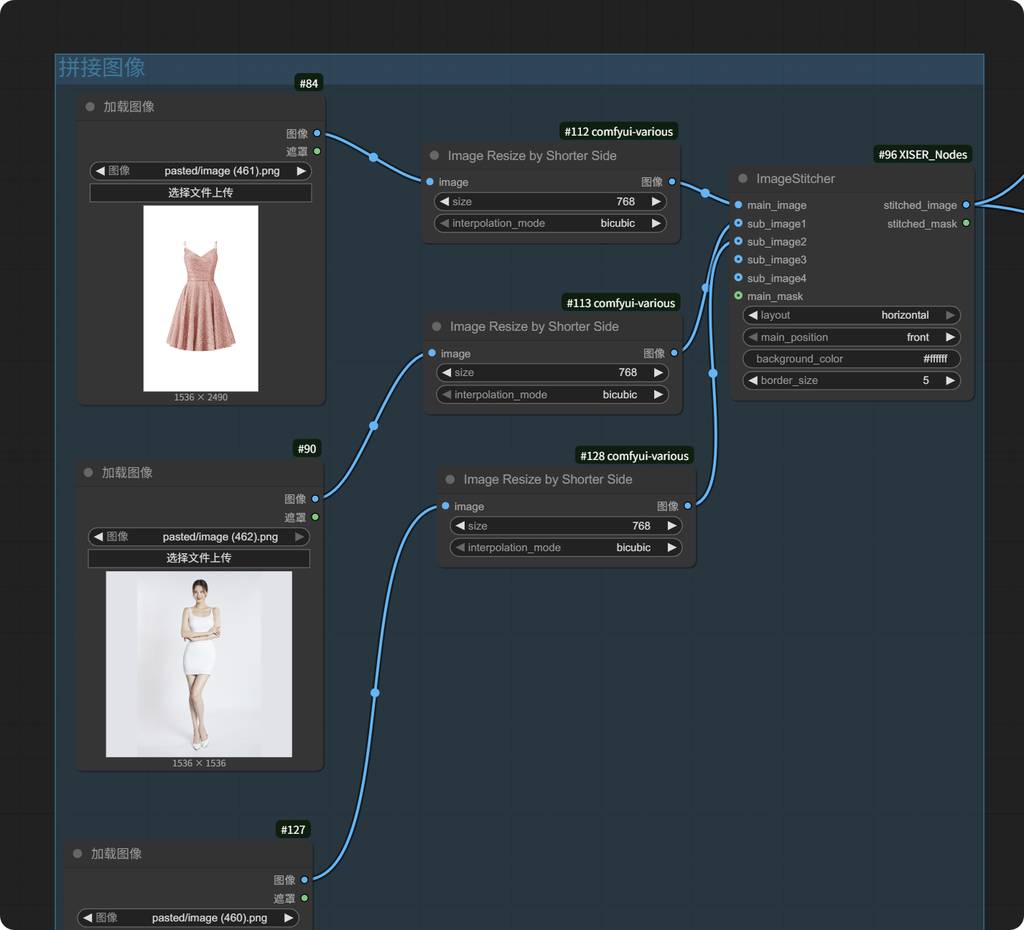
拼接图像
为避免输入 vlm 模型图片太大,做了些尺寸处理。
识别图像
使用阿里的视觉模型对图片进行识别:
提示语:
Describe the picture information in detail and be sure to be careful. Pay special attention to the location of the pictures in relation to each other.
# format:
The image show:<your descrition>
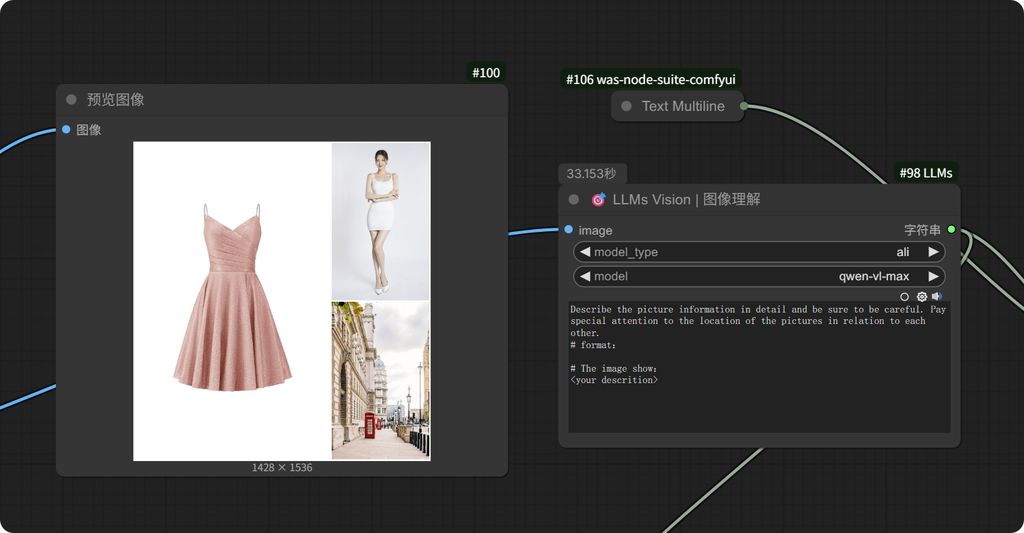
这里视觉模型会输出:
The image shows a collage of three distinct sections, each containing different visual elements. Here is a detailed description of the picture information, paying special attention to the location of the pictures in relation to each other:

### 1. **Left Section: Dress**
- **Description**: The left section of the image features a standalone photograph of a dress.
- **Details**:
  - The dress is a short, flared style with a shiny, glittery texture in a soft pink or rose gold color.
  - It has thin spaghetti straps and a V-neckline that crosses over at the bust, creating a draped effect.
  - The skirt part of the dress is A-line, giving it a full and voluminous look.
- **Position**: This section occupies the left side of the image and takes up approximately half of the total space.

### 2. **Top Right Section: Woman in White Dress**
- **Description**: The top right section shows a woman posing in a white dress.
- **Details**:
  - The woman is wearing a form-fitting, sleeveless white dress that ends above her knees.
  - She has her arms crossed over her chest and is standing with one leg slightly bent.
  - Her hair is styled in a neat, straight manner, and she is wearing white high-heeled shoes.
- **Position**: This section is located in the top right corner of the image, taking up about a quarter of the total space.

### 3. **Bottom Right Section: Street Scene**
- **Description**: The bottom right section depicts a street scene, likely in an urban area with historical architecture.
- **Details**:
  - The scene includes a large, ornate building with classical architectural features such as columns and detailed facades.
  - There is a red telephone booth, which is iconic of certain cities like London.
  - The street is paved, and there are lampposts lining the sidewalk.
  - In the background, there are additional buildings and some greenery.
- **Position**: This section is located in the bottom right corner of the image, also taking up about a quarter of the total space.

### **Relationship Between the Sections**
- **Arrangement**: The image is divided into three sections: the left side (dress), the top right (woman in white dress), and the bottom right (street scene).
- **Separation**: Each section is clearly separated from the others, with no overlapping elements.
- **Visual Flow**: The viewer's eye naturally moves from the dress on the left to the woman in the top right and then down to the street scene in the bottom right.

### **Overall Impression**
The image combines elements of fashion (the dress and the woman in the white dress) with a real-world setting (the street scene). This juxtaposition might suggest a narrative or thematic connection, such as fashion in an urban Kontext, though the specific relationship between the elements is not explicitly stated.

# The image shows:A collage consisting of three sections: a shiny pink dress on the left, a woman in a white dress in the top right, and a street scene with historical architecture and a red telephone booth in the bottom right. Each section is distinct and occupies a specific portion of the image, with no overlap between them.
越详细越好!
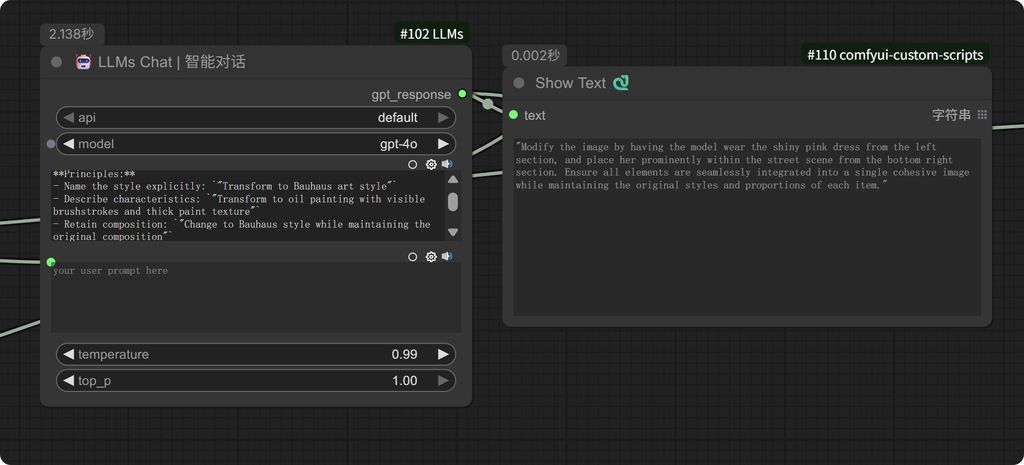
Llm 提示语处理
使用 gpt-4o模型,进一步整理。
注意规则部分,其实是参考 ComfyUI 官方的规则写的。
# Role
You are an image specialist, designer, and marketing designer skilled in interpreting user intent and modifying images.

# Task
Based on my input, craft an appropriate prompt in English.
1. First, understand the input image.
2. Based on your understanding of the image, generate a prompt according to the prompt rules and user requirements.

# Prompt Rules

Use English

### 1. Basic Modifications
- Be simple and direct: `"Change the car color to red"`
- Preserve style: `"Change to daytime while maintaining the original painting style"`

### 2. Style Transformation
**Principles:**
- Name the style explicitly: `"Transform to Bauhaus art style"`
- Describe characteristics: `"Transform to oil painting with visible brushstrokes and thick paint texture"`
- Retain composition: `"Change to Bauhaus style while maintaining the original composition"`

### 3. Character Consistency
**Framework:**
- Use specific descriptions: `"The woman with short black hair"` instead of `"her"`
- Preserve features: `"while maintaining the same facial features, hairstyle, and expression"`
- Modify step-by-step: `"Modify backgrounds first, then actions"`

### 4. Text Editing
- Use quotation marks: `"Replace 'joy' with 'BFL'"`
- Preserve formatting: `"Replace text while maintaining the same font style"`

## Troubleshooting Common Issues

### Excessive Character Alterations
❌ Incorrect: `"Transform the person into a Viking"`
✅ Correct: `"Change the clothes to those of a Viking warrior while preserving facial features"`

### Composition Shifts
❌ Incorrect: `"Put him on a beach"`
✅ Correct: `"Change the background to a beach while keeping the person in the exact same position, scale, and pose"`

### Inaccurate Style Application
❌ Incorrect: `"Make it a sketch"`
✅ Correct: `"Convert to a pencil sketch with natural graphite lines, cross-hatching, and visible paper texture"`

## Core Principles

1. **Be Specific** — Use precise descriptions; avoid ambiguous terms.
2. **Step-by-Step Edits** — Break complex modifications into simple steps.
3. **Explicit Preservation** — Clearly state what should remain unchanged.
4. **Verb Choice** — Use "change" or "replace" instead of "transform."

## Best Practice Templates

**Object Modification:**
`"Change [object] to [new state], keep [content to preserve] unchanged"`

**Style Transformation:**
`"Transform to [specific style], while maintaining [composition/character/other] unchanged"`

**Background Replacement:**
`"Change the background to [new background], keep the subject in the exact same position and pose"`

**Text Editing:**
`"Replace '[original text]' with '[new text]', maintaining the same font style"`

> **Remember:** The more specific the better. Kontext excels at understanding detailed instructions while preserving consistency.

---
*Formatting notes:*
- Retained all headings, bullet points, tables, and symbols (❌/✅).
- Adjusted terminology for clarity (e.g., "构图位置改变" → "Composition Shifts").
- Kept technical terms consistent (e.g., "Bauhaus," "cross-hatching").
- Preserved imperative tone and command structures.
然后我输入:
模特穿着左图所示的衣服,右图的街道上展示。将图中的所有元素融合成一张图。
最终提示语就处理为:
"Modify the image by having the model wear the shiny pink dress from the left section, and place her prominently within the street scene from the bottom right section. Ensure all elements are seamlessly integrated into a single cohesive image while maintaining the original styles and proportions of each item."
别看最终的提示语看起来平平无奇,在 Kontext 模型的规则下,才能够实现更精准的改图!
最后就是调用 API 出图啦。

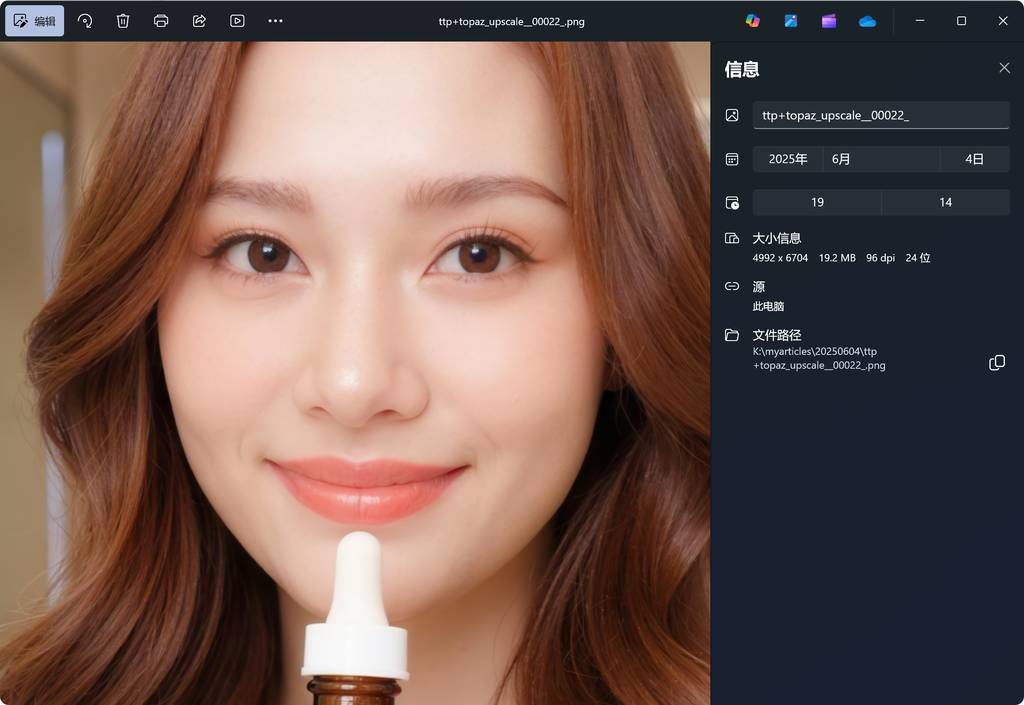
延展更多
我们知道,ComfyUI 最大的优势是工作流,那么经过 Kontext 模型出来的图,还是不够高清的,那么可以接上我之前的放大工作流进行高清化。实现真正的商用。
感兴趣的可以看看:# 【AI辅助设计】高达6K!又好又快!人像极速高清放大工作流
这里放几张接入高清放大工作流的图,大家可以对比一下:
图片有压缩,实际上图片可以搞定 6 K。
想获取更多 AI 辅助设计和设计灵感趋势? 欢迎关注我的公众号(设计小站):sjxz00。